Monday, October 28, 2013

In Memory of...

The 3 quilts, folded

Big stack of t-shirt scraps

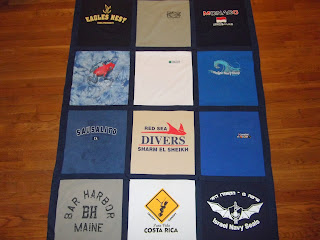
Quilt 1

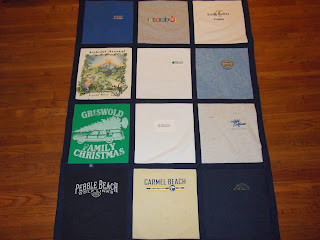
Quilt 2

Close-up quilt 3

Quilt 3

Another close-up with corner turned down to show navy fleece backing

The 3 quilts folded and stacked

I finished 3 quilts last week for someone who wanted a special Christmas gift for her family. Her dad passed away and he had a lot of t-shirts from his travels. I love making memorial quilts and hearing the story behind each shirt. I also love that every quilt is customized for each person, no two are alike, even the 3 seen here made from the same person's shirts. They are all different, each family member will have their own special treasure to remember Dad.

Friday, October 18, 2013

Ikat Anyone?

The den
Curtain panels closed

3 corner panels

Panels opened

The window on the right (above) is actually 2 windows set close together  so I made 3 panels and we installed an elbow piece to attach the 2 rods.

The colors in the window treatments are coordinating with the artwork.

Clip-on rings on curtain panels
One of the trendiest prints for textiles right now is Ikat. There are so many variations in  pattern & colors that you can stay with the trendiest but still look unique.  I better explain. Ikat is a Far-Eastern (India, Indonesia), as well as South American, technique of dying and weaving threads into patterned fabric. Where tye-die fabric is woven or knit then dyed, Ikat is dyed then woven into a design.
This fabric has a chocolate brown background with gold and ice blue designs on it. I made 7 panels with clip-on rings for this den. I've made other Ikat window treatments and throw pillows.

Ikat pillows in gold, grey, and cream.


Wednesday, October 9, 2013

Dashing! Debonair! Just Call Him Bond...Percy Bond


I found this tutorial for a cat bow tie on Pinterest from www.instructables.com. I made a few adjustments on the size of pieces to make the bow tie and reduced the amount of "turning right side out" the sewn tubes of fabric. It's just easier for me to iron and sew than sew something tiny inside out and try to turn it right side out. You can do whatever works for you. Below I've written my instructions.   
Can you see the excitement in his eyes?
Cut 3 pieces of fabric: one at 1 3/4"x12"; one at 4"x5"; one at 2"x3".

Her is where i ironed then just top-stitched the pieces for the collar and bow portions of the bow tie.

Then just top-stitch the collar.

Fold the bow piece in half inside out and sew along raw edge, leaving pressed edges open.  Then trun right side out and top-stitch the bow piece all the way around.
Sew the red piece inside out longways then sew short ends to make a loop. Turn right side out so the stitching doesn't show. Then scrunch bow piece in center to make 3 folds. Slip red center "knot" over bow piece.

 Then feed collar through the red loop.

Sew on velcro, making sure to sew fuzzy side to face out and loop side to face inside. Can you see from this photo? 

Here's a photo of the fuzzy part showing and the loop part is on the opposite end on the under side.

Another finished product!

Quite a profile huh?

Shows the back with velcro closure

Ready for dinner at a swanky restaurant. Please leave me a comment below and let me know what you think!